

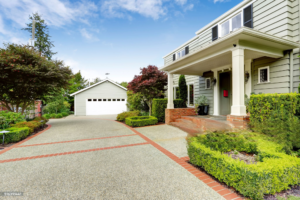
Everything You Need to Know Before Installing a Resin Driveway
Thinking about installing a resin-bound driveway? You’re not alone. With sleek aesthetics and practical benefits, resin-bound driveways have skyrocketed in popularity. But before you dive in, there’s a lot you should know—costs, maintenance, installation, and whether it’s right for your home. Let’s break it all down.
What Is a Resin Driveway?
A resin bound driveway is a surfacing solution made by mixing natural aggregates (like gravel or crushed stone) with a clear resin that binds everything together to form a smooth, solid surface.
Types of Resin Used
There are two main types:
• UV-Stable Polyurethane Resin – Prevents yellowing and fading.
• Non-UV Resin – Cheaper but may discolor under sunlight.
Resin-Bound vs. Resin-Bonded
• Resin-Bound – Permeable, smooth finish, suitable for driveways.
• Resin-Bonded – Non-permeable, textured surface, best for non-vehicle areas.
Advantages of Resin Driveways
Aesthetic Appeal
One of the biggest selling points is how beautiful they look. You can choose from various colors, finishes, and textures to match your home.
Permeability and Drainage
A well-laid resin driveway allows water to drain through naturally, reducing puddles and the risk of flooding.
Low Maintenance
Say goodbye to constant weeding and pressure washing. Resin surfaces are resistant to weeds, and dirt is easy to wash away.
Eco-Friendliness
They’re made from natural aggregates and allow groundwater recharge, which helps maintain the ecosystem.
Disadvantages of Resin Driveways
Cost
Quality resin driveways don’t come cheap. Expect to pay more than traditional options like tarmac or gravel.
Surface Sensitivity
While durable, the surface can be damaged by heavy vehicles or sharp objects.
Installation Requirements
The surface must be prepared properly, and weather conditions must be dry for a successful installation.
How to Choose the Right Resin Material
UV-Stable vs. Non-UV Resin
Go for UV-stable resin if your driveway gets lots of sun. It resists fading and stays looking fresh for longer.
Aggregates and Finishes
Choose from quartz, marble, or granite in a range of colors and grain sizes to personalize your driveway.
The Installation Process Step-by-Step
Step 1: Ground Preparation
Remove the old surface and level the ground. Ensure there’s adequate drainage.
Step 2: Base Layer Installation
Lay down a solid base—typically tarmac or concrete—for structural integrity.
Step 3: Mixing Resin and Aggregates
Measure the resin and aggregate accurately and mix until fully coated.
Step 4: Laying the Resin
Spread and smooth the mixture using a trowel. Aim for an even, seamless layer.
Step 5: Curing Time
Let it set for a minimum of 4–6 hours, and avoid heavy use for 24–48 hours.
How to Maintain Your Resin Driveway
Regular Cleaning
Sweep leaves and wash the surface with mild detergent to avoid build-up.
Weed and Moss Control
Resin-bound driveways are resistant, but occasional weeding and moss treatment help keep things pristine.
Avoiding Heavy Impacts
Avoid parking heavy commercial vehicles or dragging sharp tools over the surface.
Common Mistakes to Avoid
• Skipping proper base preparation
• Choosing non-UV resin for sunny areas
• DIY installation without the right tools
• Not allowing proper curing time
Cost Breakdown and Budgeting
Material Costs
Expect to spend around £40–£70 per m² in the UK or $60–$100 per m² in the US.
Labor Charges
Professional installation usually adds another £30–£50 per m².
Hidden Expenses
Don’t forget costs like ground preparation, waste removal, and edging materials.
When Is the Best Time to Install?
The best time to install a resin driveway is during late spring through early autumn, ideally between April and October. This period offers the most favorable weather conditions—dry, mild, and consistent temperatures—which are essential for proper curing and bonding of the resin and aggregates. Resin materials are sensitive to moisture and extreme temperatures, so installing during wet or frosty weather can lead to poor adhesion and surface defects. Planning your installation during a stretch of dry days helps ensure a smooth finish and long-lasting durability. Avoid the rainy season or peak winter to prevent unnecessary complications or delays.
Alternatives to Resin Driveways
Tarmac
Tarmac is Cheaper and durable but lacks design flexibility.
Concrete
Strong and long-lasting, but can crack over time.
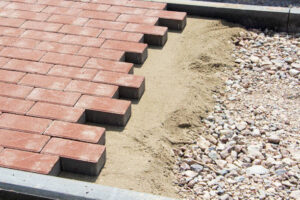
Block Paving
Block Paving driveway is Attractive and customizable, but higher maintenance than resin.
Final Verdict – Is It Worth It?
If you want a beautiful, durable, and low-maintenance driveway that enhances your curb appeal, a resin driveway is totally worth the investment—just make sure it’s done right.
Conclusion
A resin driveway can completely transform your property’s appearance while offering practical benefits like drainage and low maintenance. But it’s not a one-size-fits-all solution. Understanding the costs, requirements, and long-term commitment is key to making the right choice. Whether you go DIY or call in the pros, a little prep goes a long way. Now you’re equipped with everything you need to make a smart, stylish decision.
1. How long does a resin driveway last?
With proper maintenance, a resin driveway can last 15–20 years or more.
2. Can I install a resin driveway myself?
It’s best left to professionals. DIY installation may lead to uneven finishes and poor drainage.
3. Is a resin driveway slippery when wet?
Not if installed correctly with anti-slip aggregates. Resin bonded driveways offer more grip.
4. Can resin driveways crack?
If the base is unstable or poorly prepared, cracks can occur. A solid base prevents this.
5. How soon can I use my driveway after installation?
You can walk on it after 24 hours and drive on it after 48 hours, depending on weather.